Mount Rainier National Park is the closest major alpine national park to Seattle, and a one-day visit works best with an early start, a focused route, and a return before evening traffic. The park offers old-growth forest, waterfalls, subalpine meadows, glacier views, and visitor centres on separate road corridors, so the most efficient day trips concentrate on one main area rather than trying to see everything in one day.
- What is the best Mount Rainier day trip from Seattle?
- How far is Mount Rainier from Seattle?
- Which park area should you visit?
- What is the best one-day itinerary?
- What should you do at Longmire?
- What should you do at Paradise?
- Which hikes fit a day trip?
- When is the best time to go?
- What should you know about park access?
- What should you pack for the trip?
- Why does this day trip work well?
What is the best Mount Rainier day trip from Seattle?
The best Mount Rainier day trip from Seattle is a single-loop itinerary that leaves before sunrise, reaches the park in roughly 2 hours, spends the day in one district such as Paradise or Sunrise, and returns to Seattle after 10 to 12 hours. This structure reduces driving time, fits the park’s spread-out geography, and allows enough time for one or two short hikes, scenic stops, and a meal without rushing.
Mount Rainier sits southeast of Seattle and is reached by road through a few major park entrances, with travel time depending on traffic, route, and destination inside the park. The most practical day trips begin from Seattle around 6:00 to 7:00 a.m., arrive at the park by late morning, and focus on one corridor because the park is large and the main visitor areas are separated by long drives.
A strong evergreen itinerary also needs to match the season. Summer brings the widest trail access and the clearest access to alpine viewpoints, while winter and shoulder seasons shift the plan toward lower-elevation walks, snow travel, and visitor-centre stops.
How far is Mount Rainier from Seattle?
Mount Rainier National Park is close enough for a day trip, but far enough to require an early departure and efficient planning. The common Seattle-to-park drive is about 2 hours under normal conditions, and the actual day becomes longer once you include parking, trail time, scenic stops, and the return journey.
The distance works for a day trip because Seattle has direct access to the park’s western and northern approaches, and the most visited areas are built for short stays as well as longer hikes. That said, traffic can slow the outbound and return legs, especially on summer weekends and holiday periods.
For search relevance and user intent, the important point is simple: Mount Rainier is close enough for one day, but not close enough for a relaxed late start. A successful itinerary depends on leaving early, choosing one main region, and avoiding unnecessary backtracking.
Which park area should you visit?
Paradise is the best all-round day trip area for first-time visitors, while Sunrise is best for high-elevation scenery and summer wildflowers. Longmire works well for forest walks and historical context, and it also fits shorter itineraries or shoulder-season visits when higher roads and trails see heavier limits.
Paradise is one of the park’s most famous districts because it combines visitor facilities, accessible trails, meadows, and broad views of the mountain. The area includes well-known short hikes such as Skyline Trail, Bench and Snow Lake Trail, Pinnacle Peak Trail, and Rampart Ridge Trail, which gives day-trippers a wide range of effort levels.
Sunrise sits on the park’s northeast side and is known for high-country scenery, glacier views, and trails such as Naches Peak Loop, Mt Fremont Lookout, and Burroughs Mountain. This district is especially useful in summer, when the elevated terrain gives visitors more stable access to alpine scenery.
Longmire is the historic lower-elevation gateway on the southwest side. It is a practical stop for a day trip because it provides forest scenery, interpretive history, and easy access to shorter walks before or after a Paradise-focused schedule.
What is the best one-day itinerary?
The best one-day itinerary begins in Seattle early, stops first at Longmire or a lower-elevation trail, continues to Paradise for lunch and a major hike, adds one scenic stop such as Reflection Lakes or Narada Falls, and returns to Seattle in the late afternoon. This sequence keeps the day efficient, uses the most visited corridor, and limits the risk of spending too much time driving.
A practical sample itinerary looks like this:
Leave Seattle at 6:00 a.m. to 6:30 a.m. to avoid the busiest traffic. Arrive at Longmire around 8:00 a.m. to 9:00 a.m. for a short walk and a first break. Continue to Paradise by late morning, spend several hours on a trail or viewpoint circuit, then add one waterfall or lake stop before heading back to Seattle around 4:00 p.m. to 5:00 p.m.
This order works because the lower-elevation stops warm up the day and the main alpine district receives the longest block of time. It also keeps the itinerary flexible enough for weather, snow, crowds, and seasonal road conditions.
What should you do at Longmire?
Longmire is the best first stop for history, forest scenery, and an easier pace before the main alpine part of the day. It sits in the southwest part of the park and offers old-growth forest, interpretive information, and short walking options that suit almost any fitness level.
One strong stop is the Trail of the Shadows area, a short interpretive walk that introduces the landscape, volcanic setting, and early park history. Longmire also gives visitors a natural transition from the drive into the park’s quieter forest zone before they continue to higher elevations.
Longmire matters for an evergreen itinerary because it adds context. A Mount Rainier day trip is not only a sightseeing run; it is also a chance to understand how forest, mountain, glacier, and visitor development fit together inside a national park system managed for recreation and conservation.
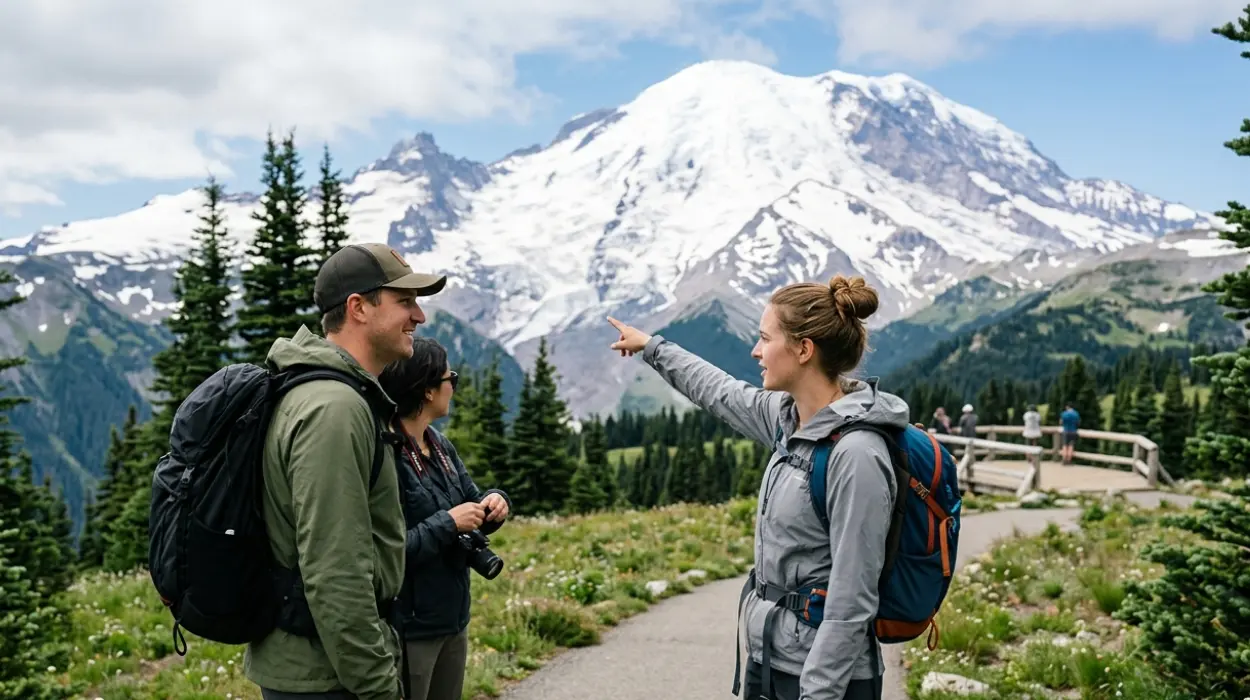
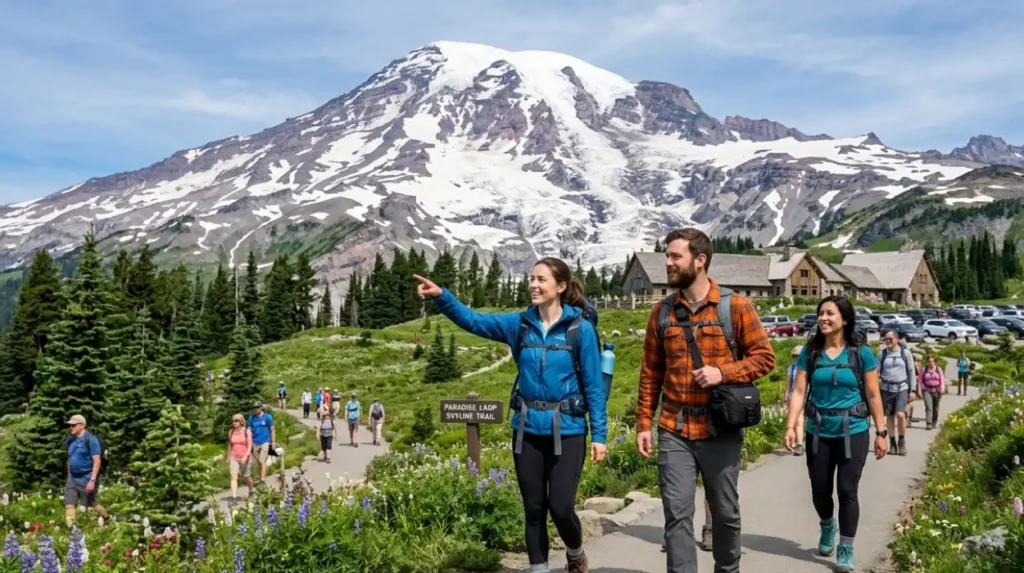
What should you do at Paradise?
Paradise is the core stop for most Mount Rainier day trips because it combines trail access, visitor services, and some of the park’s most iconic mountain views. It is also where many visitors spend their longest block of time, since the district has enough trail choice to fill several hours without leaving the area.
The Henry M. Jackson Visitor Center is a useful place to begin because it provides maps, interpretive material, restrooms, and weather context. After that, many visitors choose a short-to-moderate hike such as Skyline Trail, which the National Park Service lists at about 5 miles round trip, or easier nearby trails depending on conditions and time.
Paradise is particularly important in summer because snowmelt opens more terrain and wildflower viewing improves in subalpine meadows. In winter, the same zone often supports snowshoeing and snow-based recreation instead of bare-ground hiking.
Which hikes fit a day trip?
The best day-trip hikes are short to moderate trails with strong payoff, including Skyline Trail, Trail of the Shadows, Narada Falls area walks, Naches Peak Loop, and Pinnacle Peak Trail. These trails fit a one-day schedule because they deliver views, forest, meadows, or waterfalls without requiring a full-day backcountry commitment.
The National Park Service lists many trails by distance, which helps visitors choose realistically. Examples include Trail of the Shadows, Bench and Snow Lake Trail, Skyline Trail, Narada Falls access, Naches Peak Loop, and Pinnacle Peak Trail, all of which suit different fitness levels and seasons.
For a broad audience, the best strategy is to match trail length to the rest of the day. If the itinerary already includes several scenic stops, choose a shorter hike. If the day centres on hiking, choose a longer trail and reduce the number of drive-time stops.
When is the best time to go?
The best time for a Mount Rainier day trip is summer, especially July through September, because trail access is widest and alpine scenery is most reliable. That period also gives the best chance of reaching higher-elevation viewpoints and seeing meadows, glaciers, and mountain ridges with fewer seasonal barriers.
Wildflower season is especially strong from mid-July through early August in many visitor discussions and regional travel guides, and summer is the clearest season for broad trail access. This timing aligns with the National Park Service emphasis on checking trail conditions and current road status before hiking.
Shoulder seasons still work for lower-elevation stops, but winter changes the experience significantly. Snow travel, restricted access, and shorter daylight all reduce how much of the park fits into one day.
What should you know about park access?
Mount Rainier access depends on road status, trail conditions, and seasonal restrictions, so every day trip should begin with current park information. The National Park Service advises visitors to check trail conditions before hiking, because conditions change through the season and can affect safety and route choice.
The park also has location-specific limitations. The Carbon River and Mowich Lake areas have access issues related to the SR165/Fairfax Bridge closure, and some trails or roads have winter closures or limited access depending on the area. Pets are not allowed on trails, in wilderness areas, or inside buildings, with limited exceptions.
These rules matter because an evergreen travel article should help users plan correctly, not just inspire them. A good day trip is one that matches seasonal reality, follows park regulations, and avoids wasted driving.
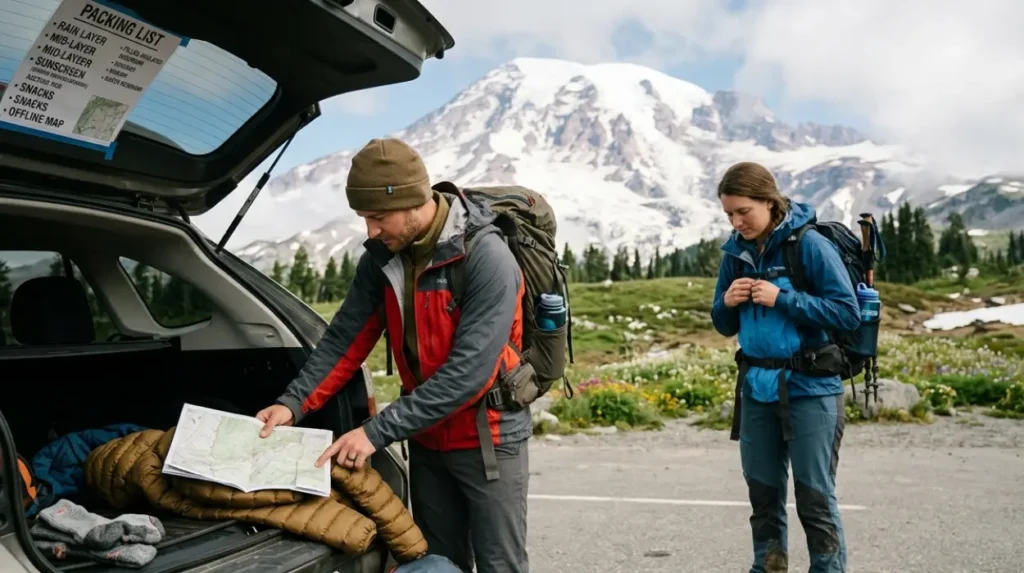
What should you pack for the trip?
A Mount Rainier day trip needs layered clothing, water, snacks, sturdy shoes, sun protection, and a full tank of fuel before entering the park. The mountain environment changes quickly with elevation, and even summer conditions feel cooler and wetter than Seattle.
Practical items include a rain shell, warm mid-layer, extra socks, a charged phone, an offline map, sunglasses, and a lunch you can eat outdoors or at a visitor area. A camera or phone also helps, because the park’s meadows, waterfalls, and glacier viewpoints create strong visual variety throughout the day.
Visitors should also carry enough flexibility to change plans. A lower-elevation trail works better on a cloudy or snowy day, while a higher-elevation hike suits clear summer weather and more stable trail access.
Why does this day trip work well?
This itinerary works because it balances travel time, elevation change, and park highlights into one realistic route. It gives first-time visitors a defined structure, supports repeat visits with trail and district choices, and keeps the focus on the park’s strongest experiences rather than on trying to cover every road.
Mount Rainier is a large park with distinct zones, and the smartest one-day plan accepts that geography. Choosing one corridor, usually Paradise or Sunrise, gives the visitor a complete experience of forest, mountain, and alpine landscape without the fatigue of excessive driving.
It also performs well as evergreen content because the underlying facts remain stable year to year: the park stays close to Seattle, summer offers the broadest access, and the main districts remain the same core day-trip anchors.
What is the best Mount Rainier day trip from Seattle?
The best day trip from Seattle to Mount Rainier National Park is an early-start itinerary focused on one main park corridor, usually Paradise or Sunrise. This approach gives enough time for scenic drives, short hikes, waterfalls, glacier views, and a relaxed return to Seattle in the evening.